Showing posts with label Apache. Show all posts

Sunday, January 18, 2015

Apache Stratos VM Cartridges

This is another part of A Series of Blog Posts on Apache Stratos Cartridges. We will go through VM Cartridges in this blog post. Please hit Apache Stratos Cartridges if you haven’t read it before.

Apache Stratos VM Cartridges

A VM cartridge is a virtual machine (VM) on an IaaS that has software components to interact with Apache Stratos.

Components of a VM Cartridge

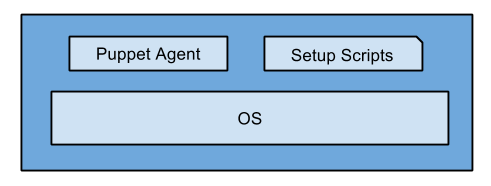
A generic VM cartridge includes Operating System, Puppet Agent, Init Scripts as shown below;
Generic Cartridge.png
A base image or an AMI will contain all these components and the VM will be spawned from this base image. All the other softwares such as Cartridge Agent and Server Apps will be installed at runtime using configuration management tools like Puppet or Chef.

A fully configured cartridge includes Operating System, Puppet Agent, Init Scripts, Cartridge Agent, Server Apps, and any other Dependent Apps as shown below;
Fully Configured Cartridge.png
All the needed softwares are already installed in the base image. Nothing will be installed at runtime, hence cartridge instance will be ready for use as soon as the instance is spawned.

Lets go through each components.

Base Image

As mentioned above, a generic base image will contain OS, Puppet Agent and Init Scripts, a fully configured base image will contain OS, Puppet Agent, Init Scripts, Cartridge Agent, Server Apps, and any other dependent apps. Stratos will use the base image to spawn cartridge instances.

Hit Creating a Cartridge to learn how to create a base image in various IaaSes.

Puppet Agent

The job of the Puppet Agent is to talk with Puppet Master periodically and configure itself according to Puppet Master’s instructions. Hit Puppet Labs to learn about puppet.

Init Scripts

It will start the Puppet Agent at the instance startup, so that Puppet Agent will connect to Puppet Master and do the node configuration.

Cartridge Agent

Cartridge Agent is a component that resides within a cartridge instance and handles the communication between the cartridge and Stratos. Hit Cartridge Agent for more information.

Server Apps

These are your applications such as Tomcat, PHP, MySQL, Wordpress, Ruby etc which you want to run on top of Stratos.

Dependent Apps

These are any apps which are needed for your Server Apps.

Puppet Master

Puppet Master contains all the puppet modules for cartridges.Hit Puppet Labs to learn about puppet.

Puppet Modules

Puppet Modules are self-contained bundles of code and data .Puppet master contains all the puppet modules for cartridges in Stratos. Hit How Cartridge Puppet Modules are organized in Apache Stratos? for more information.

Put it all together

Lets put all the components together and understand how cartridge works.
  • A cartridge deployer deploys a cartridge by giving details such as service name (a.k.a cartridge type), IaaS configuration details, base image id and the region where it resides, etc. Stratos will validate these information, update its in-memory and store these in the registry. 
  • A cartridge subscriber comes and subscribe to a cartridge. Stratos will spawn a new instance using the base image. In addition Stratos will send a payload with some information such as server name, puppet master name and IP, cluster id and so on. 
  • When a new VM (cartridge instance) is started, the Init Script will be executed at the instance boot up. This Init Script in turn will start the Puppet Agent. 
  • Meanwhile, Stratos will set the hostname of the new VM to a random string with service name as substring. 
  • When the Puppet Agent is started, it will talk with Puppet Master. Puppet Master has instructions about how each nodes should be configured. To be more specific, it has instructions about how each cartridge instance of a particular cartridge (service type) to be configured. Puppet Agent will configure the cartridge instance according to what is defined in Puppet Master for its service name by string matching the hostname. 
  • Once Puppet Agent configures everything successfully, Cartridge Agent within cartridge instance will start to communicate with Stratos. At one point, it will publish instance activated event to message broker. Thereafter this cartridge instance will be considered as an active instance and ready to accept traffic.
That is an end-to-end process from cartridge deployment to subscription to instance creation to instance configuration to instance activation.

Next thing to do

Now you have learned about VM Cartridges. Hit How to create a VM Cartridge? if you want to create a VM Cartridge. Hit Apache Stratos Docker Cartridges if you want to learn about Docker Cartridges.

References

Tuesday, January 13, 2015

A Series of Blog Posts on Apache Stratos Cartridges

Are you looking for a way to start contributing to Apache Stratos? You hit the right page!

The best way to start contributing to Apache Stratos is through developing and testing Cartridges. As I found there are not much useful guides for Stratos cartridge developers, I am writing a series of blog posts on Apache Stratos Cartridges to help those who wish to contribute to Apache Stratos. You will be able to contribute a good quality cartridge to Apache Stratos project by following this blog series.

Blog 5 - How to create a Docker Cartridge?

I will add some more advanced topics to this series later. If you want any specific topic on Apache Stratos Cartridges, feel free to leave a comment here.

Monday, August 4, 2014

Using PostgreSQL cartridge on Apache Stratos

This blog post explains how you would use PostgreSQL cartridge on Apache Stratos.


Requirements

  • You need to have OpenStack/EC2 (IaaS provider) installed and configured.
  • You need to have Apache Stratos 4.0.0 installed, configured and running.
  • You need to have a Puppet master instance configured and running.


Install required puppetforge modules


  1. Login to your puppet master node
  2. Get root access
         sudo -i
  3. Install Git
         apt-get install -y git
  4. Clone puppetforge script
         git clone https://github.com/R-Rajkumar/puppetforge.git
  5. Go into cloned puppetforge directory
         cd /dir/to/puppetforge/
  6. Modify your puppetforge.modules file to have following entry
         puppetlabs-postgresql
  7. Run puppetforge.sh
         ./puppetforge.sh


Defining PostgreSQL cartridge node in puppet master

PostgreSQL node will have PostgreSQL server and a web interface to manage the server. You can define a PostgreSQL node as bellow,

Let's look into details about each classes and parameters.


PostgreSQL module


This is where we tell puppet to install PostgreSQL server. This module is developed and managed by puppet laps. Let's see a basic usage of this module. Refer here for a complete reference of this module.

ip_mask_deny_postgres_user 
This parameter restricts from where a super user can access the server. That is, server will deny IP addresses matches the given regular expression. I have set it to match 0.0.0.0/32 which will not match any IP addresses, thus a super can access the server from anywhere.

ip_mask_allow_all_users 
This parameter restricts from where a user can access the server. That is, server will accept access from IP addresses matches to the given regular expression. I have set it to 0.0.0.0/0 which will match all IP addresses, thus a user can access the server from anywhere.

postgres_password
This parameter sets the password for super user, postgres.
There are a whole lot of additional arguments which you can give to this class. Refer here for a complete reference.

Then, we are creating a database and a user for that database.


This is one of the many ways we can create databases using this module.


phpPgAdmin module


Then, we are installing phpPgAdmin, browser based management console for PostgreSQL.


This module is developed and managed by me, can be found here.

Let's have a look at all parameters one by one.

db_host 
The hostname/IP address of the PostgreSQL server to manage. I am installing phpPgAdmin in the same node as PostgreSQL server, hence set it to localhost. Default value is localhost.

db_port
The PostgreSQL port. Default value is 5432.

owned_only
This parameter restricts who can view what. If it is true, a user can view only his databases. If it is false, a user can view all the databases on the server.

extra_login_security
If extra login security is true, then logins via phpPgAdmin with no password or certain usernames (pgsql, postgres, root, administrator) will be denied.

These are some basic usage of this class. There are some more things will be parameterized in near future.

Finally, we are defining an order of installation.
Class['postgresql::server']->Class['phppgadmin']~> Class['agent']

That's it from puppet master side.


Deploying PostgreSQL cartridge


You can deploy PostgreSQL cartridge now. A sample deployment on an openstack environment looks like below,


Be sure to set port to 5432. Otherwise, PostgreSQL instance will not be activated.

You have successfully deployed PostgreSQL cartridge now.


You can subscribe to it now.


Go to My Cartridges,


Click your PostgreSQL cartridge to get your access URLs,


Accessing subscribed PostgreSQL


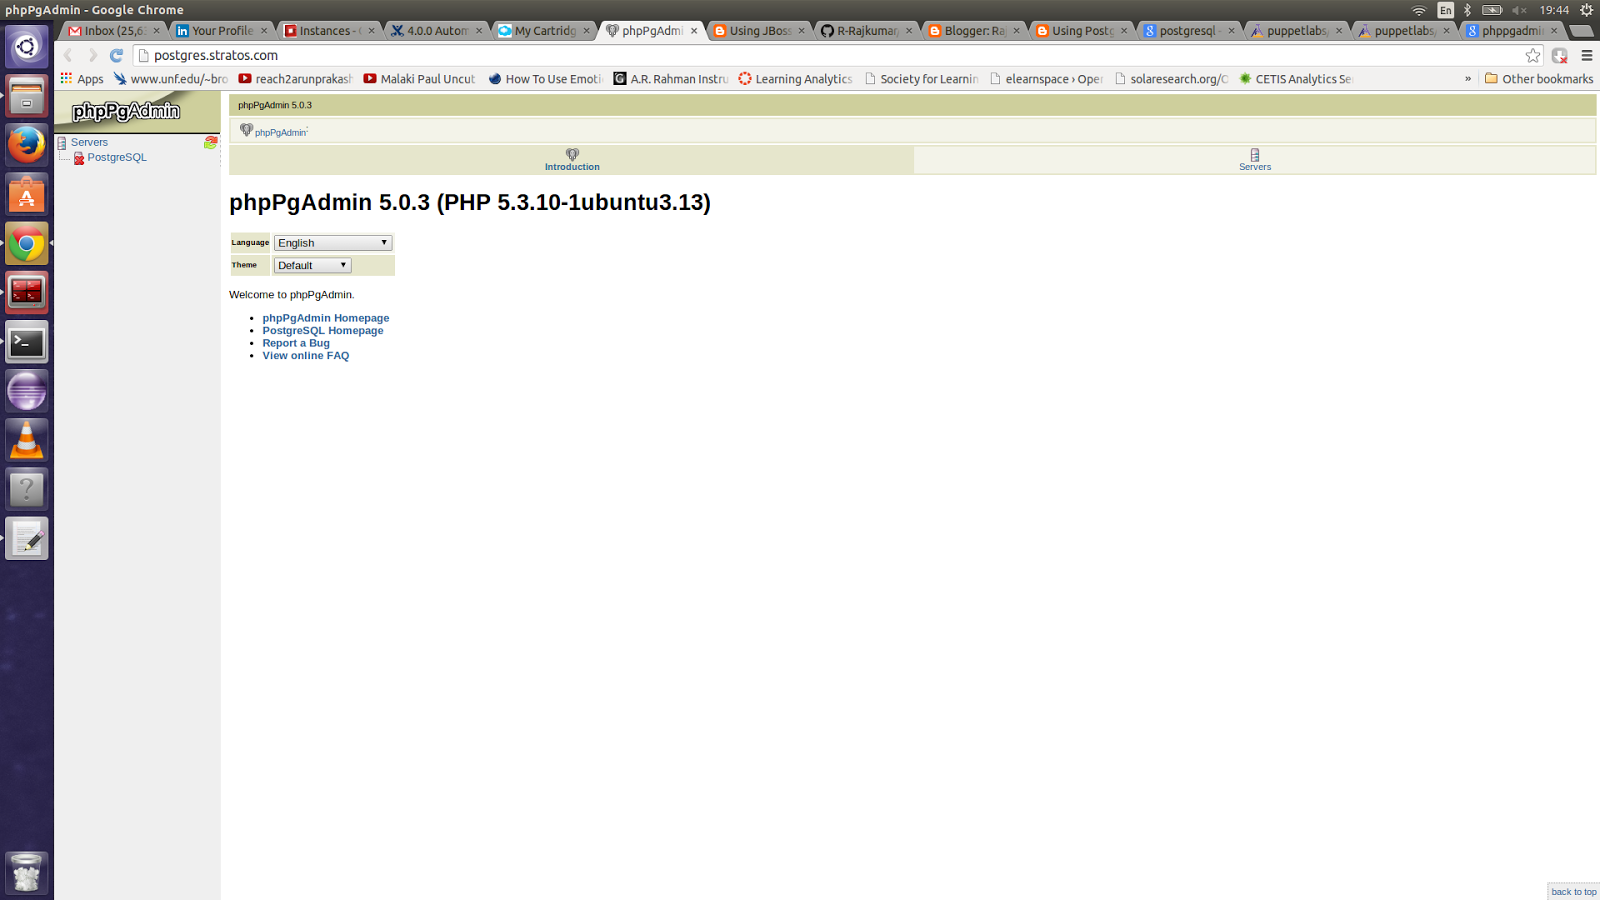
Locate http://$member_public_IP on your browser, you will get access to PostgreSQL server via phpPgAdmin. If you want, you can map postgres.stratos.com to the member public IP in your hosts file and access it on http://postgres.stratos.com/


You can login using any of the user you have defined in your node definition or you can login as a super user(postgres). I have defined a user called root in my node definition (nodes.pp), I can login as root/root. You can login as postgres/postgres if you haven't created any user.


That's it. You can do everything that you would do your own PostgreSQL instance installed on your personal computer.

Saturday, May 3, 2014

Hello World Web Service - Apache Axis2


This post explains how you can develop, deploy and access web services using Axis2 from scratch. This is going to be a very basic tutorial. We are not going to use any IDE or building tools like Maven. But, by doing so, we can understand each and every aspects of developing, deploying and consuming web services. Next part of this tutorial explains how we can do the same thing easily using Maven.

We are going to develop a hello world web service using Apache Axis2. Apache Axis2 is nothing but a web service engine. You can develop, deploy and access web services using Axis2. 


Installation

1. Download the latest Axis2 binary distribution here.
2. Extract it to a convenient directory. Let's call it AXIS2_HOME.

You will get the following structure under your AXIS2_HOME.

 
That's it. You have installed it.


Running the Axis2 server

In your terminal, navigate to "AXIS2_HOME/bin" directory and run the following command.
sh axis2server.sh

If your server starts successfully, you will get something similar as below in your terminal.


Deploying services 

"AXIS2_HOME/repository/services" is the deployment directory in Axis2. You have to copy your axis2 service (yourService.aar) to this directory.

Point the browser URL to http://localhost:8080/axis2/services/
You will see all the deployed services.


If you click on one service, you can get access to it's WSDL.


Developing an Axis2 service

Okay, let's develop our hello world axis2 service and deploy it. 

Create a folder structure as bellow,


Create a class "HelloService.java" as bellow and save under "Service" directory.

Create a service descriptor "Services.xml" as bellow and save under "Service/target/META-INF" directory.

Run the following command from "Service" directory to compile the HelloService.java and move HelloService.class to target directory.
javac HelloService.java -d target/

 
Run the following command from "Service/target" directory to package your service.
jar -cvf HelloService.aar *

 
Let's deploy our service. Copy "Service/target/HelloService.aar" to "AXIS2_HOME/repository/service" directory.

Point the browser URL to http://localhost:8080/axis2/services/.
You will see that your HelloService is listed under deployed services.

Developing a client 

Having our service up and running, lets develop a client to consume our service.

Lets use wsdl2java tool to generate client stubs which will allow you to access the service.

You don't have to download wsdl2java separately. It is shipped with Axis2 itself. You can find it  at "AXIS2_HOME/bin/wsdl2java.sh".

Create a directory "Client".

In your terminal, navigate to "Client" directory, and run the following command to generate client stubs using wsdl2java.

sh AXIS2_HOME/bin/wsdl2java.sh -uri http://localhost:8080/axis2/services/HelloService?wsdl


Two classes (HelloServiceStub.java and HelloServiceCallbackHandler.java) will be generated inside your "Client" directory in the following package hierarchy.


These two classes allow you to access the service that we have deployed earlier. Lets create our client.

Create a class "Client.java" inside the same package as the above two classes,

Lets compile client codes. Create a directory "target" inside your "Client" directory. In your terminal run the following command from your "Client" directory. It will compile all java files and move .class files to target directory.
javac -extdirs AXIS2_HOME/lib/   src/org/apache/ws/axis2/*.java  -d target/
Please note that we are setting all required jars to our class path in the above command.

Lets run our client. In your terminal, navigate to "Client/target" directory and run the following command.
java   -Djava.ext.dirs=AXIS2_HOME/lib/   org.apache.ws.axis2.Client

You will get the following output in your terminal.
Response : Hello Raj

That's it. You have successfully implemented, deployed and consumed an axis2 service.